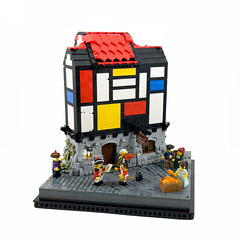
Modular Standards for Lego City Buildings
Sat, June 12, 2010, 22:01 13 Comments
I think I’ll hit 2,000 page views tomorrow (though I think the World Cup may have an impact on AFOLs who surf the net, haha). To “commemorate” the occasion, I’ve re-blogged a great article I came across awhile back. It’s a how-to guide to modular buildings by Aliencat, translated by Rapseflaps from Eurobricks.
The modular series is probably one of the factors that made me an AFOL. I love city sets to build up my town (kinda like playing Sim City come to think of it), but only the modular series offers the challenge and surprises (new techniques!) that makes building those sets such a joy. Since there is only one official modular set a year, what’s a gal to do but to create more herself?
So Aliencat’s guide comes in useful to understand the basics behind creating more sets. Hope you enjoy and find it as useful as I did. 🙂
************************************************
Link to Aliencat’s original article: Link (thanks Aliencat!)
Link to Eurobricks discussion: Link (thanks to Rick & Rapseflaps!)
.
How-To: Modular Buildings
by Aliencat
We regularly see each other at meetings and bring along a construction or two of our own. An ideal standard for combining buildings is the so-called Café Corner Modular Standard (or CCMS).
But if you don’t own a Cafe Corner, Green Grocer, etc., how do you know what rules to follow to make your building fit in with the rest?
I will describe the CCMS as applied in Lego’s sets and as applied by many fans. There’s basically two types of building in this standard. Will you write along?
1. Straight buildings
Generally speaking, every baseplate is 32 studs deep. The width is variable with straight buildings, always being a multiple of 8 studs. A common used width is 16 studs wide. The connection points, pavement, walls etc. will then have the following sizes:
![[image]](https://i0.wp.com/www.brickshelf.com/gallery/Aliencat/MISC/Ambassador/1632-1.jpg)
![[image]](https://i0.wp.com/www.brickshelf.com/gallery/Aliencat/MISC/Ambassador/1632-2.jpg)
Whether your building is 8 studs wide or 64 studs wide, the sizes in depth are always the same. That way the Technic bricks with hole will always align and allow for the buildings to be attached to one another through the use of Technic pins.
2. Corner buildings
In the case of a corner building, you’re dealing with two connecting points at a 90 degree angle of each other. Therefore, your baseplate will always have to be 32 x 32 studs. Of course you can make the full building larger by attaching straight buildings forming a continuous whole at either side, but the corner module must be 32 x 32:
![[image]](https://i0.wp.com/www.brickshelf.com/gallery/Aliencat/MISC/Ambassador/3232-1.jpg)
![[image]](https://i0.wp.com/www.brickshelf.com/gallery/Aliencat/MISC/Ambassador/3232-2.jpg)
3. Variation in depth sizes
If you look at a real-life (old) street, you will see that not all buildings align in a perfectly straight line: some jut out a bit, others fall a little further back. If you put a number of CCMS buildings in a row, this method of alighnment will give you the best result. As long as you leave the Technic bricks in the right position for connecting, you’re free to place your front and back wall at will. This might result in something like this:
![[image]](https://i0.wp.com/www.brickshelf.com/gallery/Aliencat/MISC/Ambassador/row.jpg)
Keep the variation in mind, because of your side wall. In some cases, part of your side wall will be visible. So if you were planning to omit your side wall, or make one out of all the colors you won’t be needing for the front and back walls, make sure that at least the edge of the side wall that juts out is made of a color that fits with the rest of the building.
I myself always build an entire side wall if I know the building is going to end up in a combined layout with other builders: because you don’t quite know what will end up next to you. For all you know you might end up next to a construction side, leaving your side wall entirely exposed.
4. Height
The last point I wish to adress is height. In terms of height, you’re basically free to do whatever you want. Make it as tall or as low as you wish. One floor 6 bricks high, eight floors 12 bricks high each, everything is possible. Do keep in mind though, that if you’re making a very tall building, your side walls will definitely be visible. So make it into something exciting featuring windows or something, so it’s not just one boring, flat wall. Do take care that you won’t have anything protruding over the edges, since you may not know how high the building next to yours might be.
Variation in height is another reason to build side walls in a matching color when your creation will end up in a combined layout: the building next to yours might be very low and you won’t know ahead of time.


This is an excellent article when applied to MOC’s. There is however one issue not addressed here – that of the actual Lego Modular Corner sets when constructed together with Lego Road Plates.
If you wish to build right up to the road edge – but not double the pavement size – and your street has two Corner buildings you are going to find yourself with a 12 stud ‘gap’ in your layout.
I have just posted one solution to this problem on MOC pages:
http://www.mocpages.com/moc.php/240809
Hope it helps! 🙂
Paul.
I’ll go for street parking solution… just convert the extra space to parallel parking spaces… Solves the lack of parking spaces in my town too. 😉
Well, since every road plate is 32×32 studs, if you have an odd number of 16×32 plates and stuff like that, the best thing to do is make that amount EVEN, since half of 32×32 is 16×32.
good tip exile =) I’m glad I went for MOC streets instead: http://www.brickshelf.com/gallery/walshklien/Modular-Houses/
…that’s certainly another way to overcome the problem!! 🙂
Is there any tips for the window styles?
I need to know how they build more than just the connections. I need to know tips about building techniques when it comes to windows, doors, stickers, tiles, and other stuff. So this techinically doesn’t tell everything.
when connecting modular buildings, which side of the building has the studs? the left, or the right?
one more thing, how many bricks tall does each building have to be, like in the 8 sets?
Very nice and informative article. You’ve explained very excellent way here about the modular buildings.
Pingback: amodularlife.word ... - Arquitetura Ideias
Pingback: Modulare Standards für Lego City-Gebäude | Lego Haus Ideen
Pingback: September TwinLUG Meeting 09-19-2021 – TwinLUG